AgroLog App help guide
Video Instructions
Video instructions on how to set up your spear: put the battery in, screw the lid, and download the app.
Instruction Manual
Here you can find instructions on how to set up your AgroLog App, how to connect your brand new Wireless Sensor Spear, and how to get the most out of them.
Contents:
Wireless Sensor Spear
Locator
Head of the Spear with temperature and moisture ambient sensor
On/Sleep mode and Forced measurement button. Hold the button for 5 seconds to power off your spear, the LEDs will blink 3 times to signal that it is powering off. Hold the button and wait for a single blink to turn on the spear again.
Shaft
Temperature sensor
Aluminum tip with temperature and moisture sensor

Details
Front:
a. Ambient temperature and moisture sensors
b. ON/Sleep mode and force measurement button. Hold the button for 5 seconds to power off your spear, the LEDs will blink 3 times to signal that it is powering off. Hold the button and wait for a single blink to turn on the spear again. Press the button once for an instant measurement.
Back:
c. Battery: please note that only Fanso ER34615M/S STD or Saft LSH 20 will work.
d. QR Code

First time user: registration and login
1.You can get the App from Google Play store or App Store.

Get your iOS App at the following link:
Get your Android App at the following link:
2. Once on the homepage click "Register!" to begin your registration!

3. Fill the form with your information: type your email, name and surname into the fields, and Sign up!

4. An email is sent to your inbox contains an activation link. Activate your account.

5. You will be automatically redirected to the AgroLog App. Now you can start using the App!
Register your Wireless Sensor Spear
The AgroLog App is the engine of our powerful Wireless Sensor Spear, therefore is crucial to the correct functioning of the spear. You need to connect the app to your Wireless Spear.
1.To do so click on the + icon and select the Wireless Sensor Spear.


2. Touch the “Scan the QR code” and point your phone camera to the back of the Wireless Sensor Spear.

3. Once scanned, rename it as you please and tap “create”. Your new wireless sensor spear is now connected to the AgroLog app. It will log all the measurements automatically to your App.

Purchase the subscription
The Wireless Sensor Spear is a device that works only with a functioning AgroLog App and an active subscription.
After registering the spear, a trial period of 3 days will start. When the trial finishes, you will be prompted to pay the spear.
1. Click on the checkout button

2. Select which type of subscription you what to purchase

3. Fill in your billing information and proceed to payment

4. If the payment is successful you will receive a message of confirmation, and you will receive an invoice in your mailbox. After payment the device(s) will start to operate and measure.


Measurements and readings
After you register the spear, pay the subscription, and now your spear is fully functional.
Your homepage will look like this:

At the top, you will have the Map overview, Alarms, time frame of the readings, and your profile.
You can visualize the graph based on different sensors, the one at the top (ambient), in the middle or at the tip.
If you have a CSS-TM you will see measurements for Temperature and Humidity, if you have a CSS-T you will see only temperature measurements.
IMPORTANT: if no crop is selected, the user will see only the relative humidity. Please select the crop, in order to measure the moisture content of the crop.
Click on a spear to expand the view and get more information.


Inside the spear you will see the different sensors and their last measurements.
At the top, you find the timeframe of the measurements shown and the settings of the spear.
Then graphs of Temperature and EMC are shown, with different colors for every sensor.
In the time frame button at the top, you can change the dates shown in the graphs. in “Realtime” you can see the most recent measurements and readings.
While in “History” you can go back in time and decide a specific timeframe between two dates.

Always inside the Spear view, at the bottom you find the Map view. In there you can position your spear on the map, see the GMS connection status and how much battery is left.

Settings and Alarms
Is critical for full functioning, that your Wireless Sensor Spear is set up correctly
1. Set up the crop type:
by going into the setting of the spear. Select the crop type the Spear is going to be put in. This is critical for a correct measurement of EMC and Humidity levels, which depend on the type of crop.

2. Set up the alarms:
the alarms will be sent as notifications to your smartphone, so that you can always be in control of your crops no matter where you are or what you are doing.

3. Set up the automatic measurement time frame:
This is the most critical setting of the Wireless Sensor Spear. The spear will do the work for you, therefore will measure automatically once per day, every 3 hours or when you prefer. It is important that you set up the frequency of the measurement, so that your crops are always secure.

Create a building
If you have several spears located in the same barn, farm, or location, you can use the building function to group them.
The building function is useful to have a quick overview of several spears together.
1. Create a new building
Click on the plus button on the homepage, to add the building. At the top, touch “Building” and its card.


2. Put dimensions and details to the building
You can customize your building to reflect the reality. You can insert dimensions and name of the building.

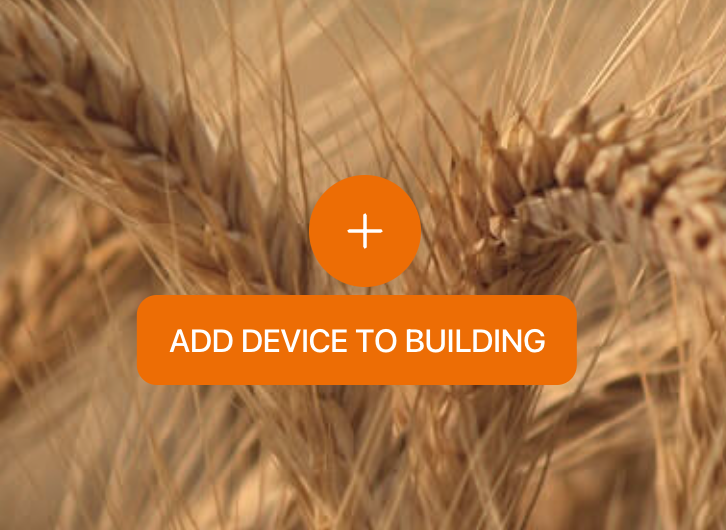
3. Add devices to your building
It is now time to add your spears to the newly created building. A button will appear “Add device to building”, click on it to add the spears you previously registered in the App.
The list of devices that you can add will be shown.

Add your devices to the building by selecting them. After the selection at the bottom of your building view, you will see an overview of all the devices you added so far to the building.

4. Position your devices inside the building
You can position the spears on the building map, so that you can have an inside map of your building. The map will show you the accurate position of your spear inside your building.
Positioning your spears in the app is useful for several purposes:
Easy to locate your spear in the grain
The App will render correct temperature and moisture maps, so that you can see an overall map of your building.
Navigate to the setting icon at the top right corner of the building view.

Scroll to the bottom of the setting. A map of your building will be shown.
The devices will be showing inside the map, press and hold on a device icon to move and position the device.
Building features
Now that you created you building, in this section you can learn how to use this function.
1. Quick overview of maximum and minimum temperature and moisture
The first to information you see is the maximum and minimum temperature and moisture inside the building.
You also have a graph view.

2. Temperature and moisture maps
You can see the temperature and moisture mapping, so you can clearly see the moisture and temperature mapping in all your building.


3. Map view
Same as the spears you can position a building on the map. Once you do it, you will able to see it in the overall map view of the App.


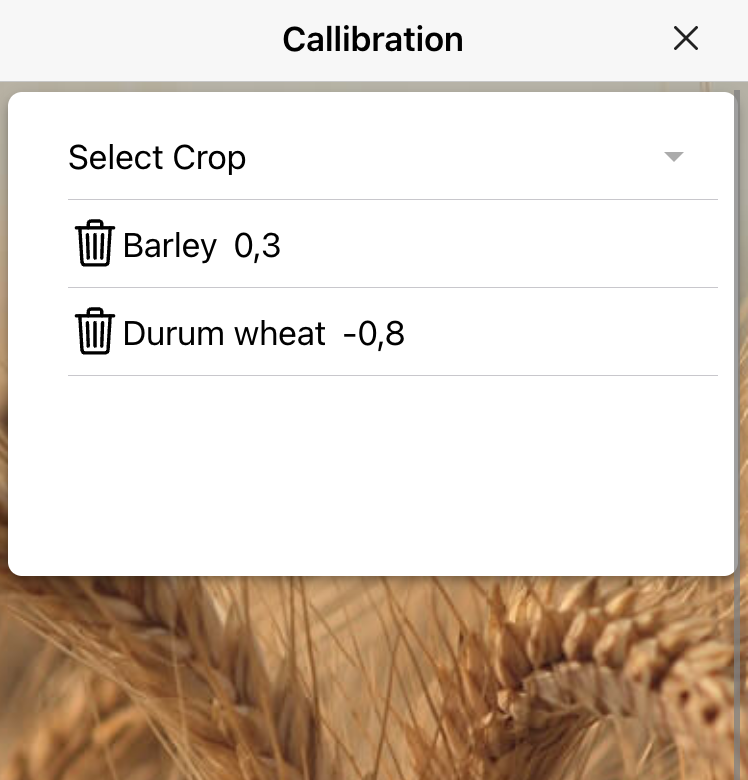
Moisture Calibration
To input a customized moisture calibration for a specific crop, navigate to:
Your profile (top right corner)
Crop calibrations
Select the crop you want to apply the calibration on
Input the value you want to offset to
The calibration will take effect from the next measurement made.
If you want to delete a calibration, click on the bin icon near the crop type.


Battery replacement
Most telemetry issues or power-off issues, will be resolved by changing the battery.
NOTE THAT ONLY SPECIFIC BATTERIES WILL WORK WITH THE SPEAR:
Fanso ER34615M/S STD or Saft LSH 20
Other batteries will not deliver power to the spear fast enough for it to function. You can purchase the batteries from us or from specialized online stores.
If you have any issue please contact support@supertech.dk


Register and pair C-PRO
Register the C-PRO
1. Open the AgroLog App
2. Click the plus icon and then C-PRO
3. On the device navigate to Settings, and then ‘Register’
4. Scan the QR code on the device’s screen
5. You have now claimed your device
Pairing the C-PRO
1. Make sure that Bluetooth is enabled on both devices
2. On the app navigate to the device you just claimed and press sync
3. Follow the instructions on the App
4. Press ‘sync’ in the main menu of the C-PRO
Remember to allow Bluetooth permissions, GPS permissions, to be able to pair, sync, and use the C-PRO with AgroLog App.

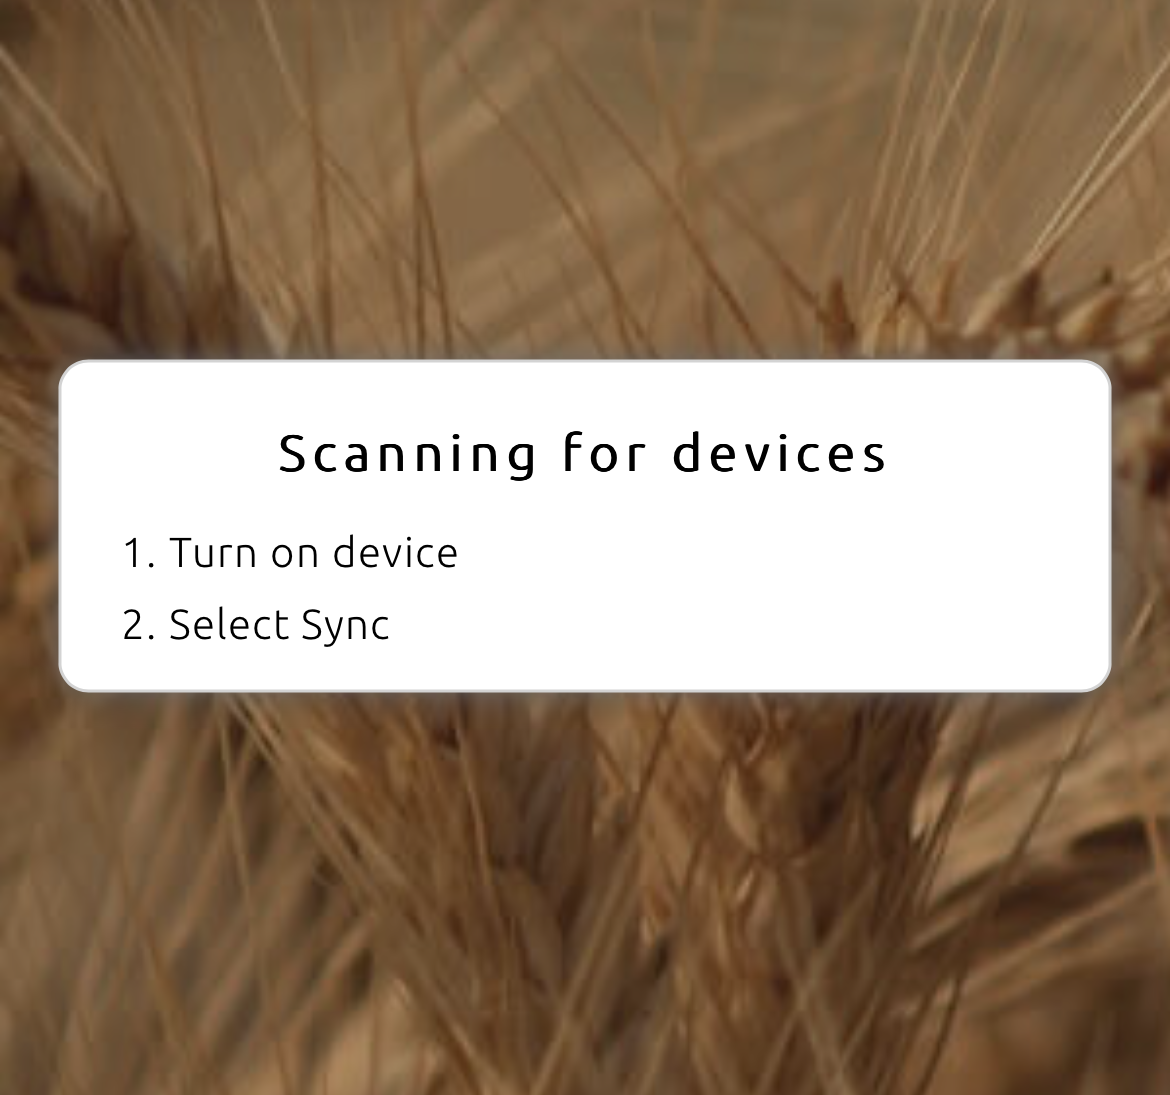

Sync C-PRO with the App
After having made measurements on your C-PRO you can sync them with the AgroLog App.
Open the app and select the device you have previously claimed.
On your C-PRO select ‘Sync’ in the main menu
When the C-PRO has transferred all the data (‘synced’) you will have all measurements listed according to the time when the measurements were performed.
NOTE: If a measurement was made when the C-PRO was not connected to a smartphone, the measurement will be assigned a timestamp upon synchronization.
On your screen you will find information for each measurement:
Moisture and temperature readings
The timestamp of the measurement
Position of each measurement
You can filter or see your measurements in:
Different time frames: measurements made last week, today, one month ago, etc.
See the measurements in a map view
You can also navigate to your settings and unclaim the device, or change its name.

Add info to your measurements
For each measurement, you can add a text note and a picture, combined with the GPS position and time from the smartphone you now have a well-documented measurement - stored on your smartphone.
Make a comment
Add a picture
Change position
